Contents
Introduction
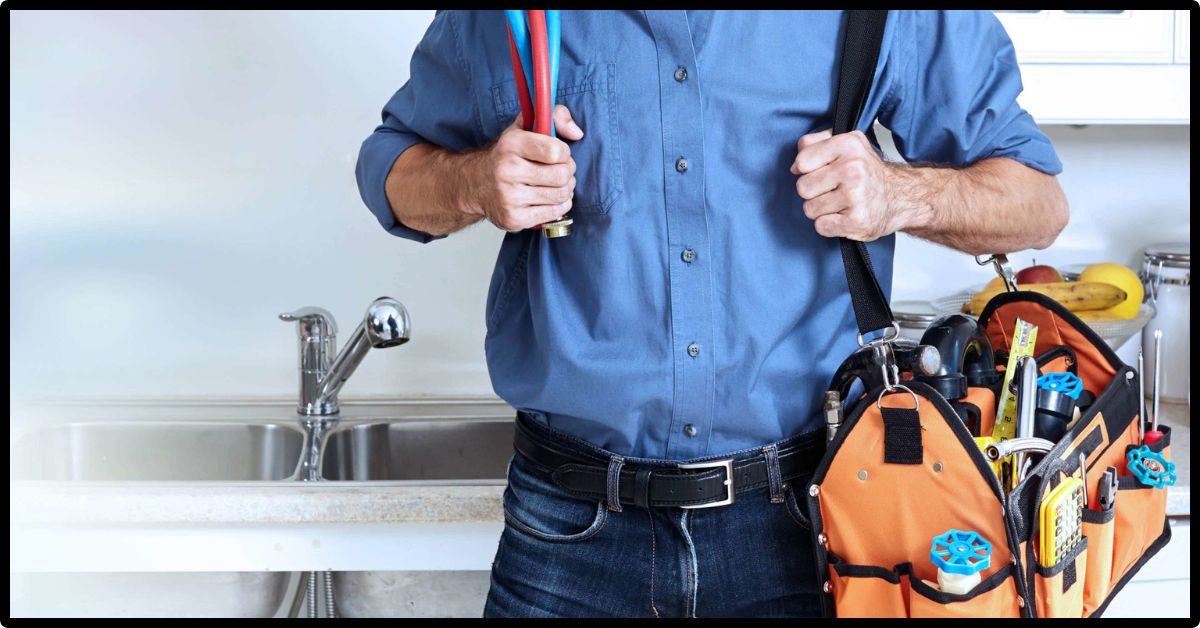
Are you tired of calling a plumber every time a leaky faucet or clogged drain throws a wrench into your day? Fear not! With just a few DIY plumbing fixes up your sleeve, you can save both time and money while feeling like the ultimate handyperson.
Let’s explore six essential plumbing repairs that will empower you to tackle everyday household issues head-on.
A. Importance of knowing basic plumbing fixes
Learning basic plumbing fixes can be a game-changer for any homeowner. Understanding how to tackle common plumbing issues not only saves you time and money but also gives you the confidence to handle unexpected situations around the house. Imagine being able to unclog a drain or fix a leaky faucet without having to wait for professional help – it’s empowering!
By mastering these DIY skills, you can take control of your home maintenance and avoid costly emergency plumber visits. Plus, knowing how to address minor plumbing problems promptly can prevent them from escalating into more significant issues down the line.
From simple tasks like fixing a running toilet to more complex repairs like dealing with burst pipes, basic plumbing knowledge equips you with the ability to troubleshoot and resolve many everyday household concerns independently. So, roll up your sleeves and dive into the world of DIY plumbing—your future self will thank you!
Clogged Drain
Dealing with a clogged drain can be a real nuisance, disrupting your daily routine and causing frustration. The common culprits behind this plumbing issue are usually a buildup of hair, grease, or soap scum that accumulates over time. Prevention is critical to avoiding a clogged drain; regular maintenance and using drain covers can help keep the pipes clear.
If you encounter a stubborn clog, fear not! There are simple DIY solutions to unclog the drain without calling in the professionals. One effective method involves using a mixture of hot water, baking soda, and vinegar to break down the blockage. Alternatively, you can use a plunger or plumber’s snake to dislodge the debris causing the obstruction.
By following these step-by-step guides and being proactive in preventing future clogs, you can save both time and money on costly repairs. So next time you encounter a clogged drain, roll up your sleeves and tackle it head-on!
A. Causes and prevention
When it comes to dealing with a clogged drain, prevention is critical. The most common causes of blockages are usually a buildup of hair, grease, soap scum, or foreign objects that accidentally find their way down the drain. To prevent clogs from happening in the first place, consider using drain strainers to catch debris before it goes down the pipes.
Regularly flushing your drains with hot water can also help break up any potential blockages forming inside. Being mindful of what you pour down the sink and avoiding dumping oil or coffee grounds down the drain can go a long way in preventing future issues. Remember that prevention is always more manageable than dealing with a stubborn clog later on!
B. Step-by-step guide on how to unclog a drain
Is there anything more frustrating than a clogged drain disrupting your daily routine? Fear not, as unclogging it can be easier than you think! First, grab a plunger and ensure there’s enough water in the sink or tub to cover the rubber end. Next, place the plunger over the drain and give it several firm plunges. If that doesn’t work, try using a mixture of baking soda and vinegar – pour them down the drain, let it fizz for about 30 minutes, then flush with hot water.
For more challenging clogs, remove the drain stopper or trap. Remember to wear gloves and have a bucket handy to catch any debris. Once removed, use a plumbing snake to dislodge any blockages deep within the pipe. Reassemble everything carefully before testing your freshly unclogged drain!
Leaky Faucet
Leaky faucets can be an annoying nuisance in any home, causing not only the constant drip-drip sound but also wasting water and money. Determining the source of the leak is crucial before attempting to fix it. Start by turning off the water supply under the sink to avoid any surprises.
Having a few essential tools on hand, like an adjustable wrench, screwdriver, and replacement parts, will make fixing a leaky faucet easier. Once you’ve identified where the leak is coming from, carefully disassemble the faucet using your tools. Look for any worn-out washers or O-rings that may need replacing.
Clean all parts thoroughly before reassembling them in their original order. Be mindful of tightening everything properly but without overdoing it to prevent future leaks. Once you’ve put everything back together, turn on the water supply and check for any remaining leaks.
Fixing a leaky faucet yourself can save you time and money, and it can also give you a sense of accomplishment—you’ll know you tackled a common plumbing issue successfully!
A. How to determine the source of the leak
So, you’ve noticed a pesky leak in your faucet and are wondering where it’s coming from. Don’t worry—identifying the source of the leak is easier than you might think.
Start by examining the faucet closely to pinpoint where the water is escaping from. Is it dripping from the spout or seeping out around the base? This initial observation will help narrow down possible causes.
Next, check all visible connections for any signs of moisture or corrosion. Tightening loose fittings or replacing worn-out seals could be all it takes to stop that annoying drip.
If you still need to figure it out after these steps, try turning off the water supply to see if the leak persists. If it stops when the water is off, chances are there’s a problem with internal components that may need replacing.
By following these simple steps, you’ll be well on your way to fixing that leaky faucet in no time!
B. Tools needed for fixing a leaky faucet
When it comes to fixing a leaky faucet, having the right tools on hand can make all the difference. Here are some essential tools you’ll need to tackle this common plumbing issue:
First and foremost, you’ll need an adjustable wrench or a pair of slip-joint pliers to help loosen and tighten various parts of the faucet.
A set of screwdrivers, including both flathead and Phillips head, will come in handy for removing screws and accessing hard-to-reach areas within the faucet.
After fixing the faucet, be sure to have the plumber’s tape on hand to seal threaded connections securely to prevent leaks or drips.
Additionally, having a flashlight nearby can help illuminate dark spaces under the sink where you may need to work on the faucet.
Keeping a rag or towel close by will help keep your work area clean and catch any excess water that may spill during repairs.
C. Detailed instructions on how to fix it
Leaky faucets can be a nuisance, but fixing them doesn’t have to be rocket science. First, turn off the water supply under the sink to prevent any mishaps. Next, cover the drain with a cloth to avoid losing small parts. Use an adjustable wrench and screwdriver to carefully dismantle the faucet.
Inspect all components for wear or damage and replace any faulty parts, such as washers or O-rings. Clean each part thoroughly before reassembling everything in reverse order. Once everything is back in place, turn on the water supply and test your handiwork by turning on the faucet.
If you still notice leaks, double-check all connections and tighten them if needed. Patience is key when it comes to fixing leaky faucets—take your time and don’t rush!
Running Toilet
Is your toilet running non-stop, driving you crazy with its constant trickling sound? A running toilet is not only annoying but can also save a significant amount of water and money on your utility bills. The culprit behind this common plumbing issue could be a faulty flapper valve, overflow tube problems, or issues with the fill valve.
If you suspect that your toilet is running unnecessarily, start by checking the flapper valve for any signs of wear or damage. Adjusting the chain connected to it can solve the problem. Another common reason for a running toilet is an overflowing float cup in the tank – simply changing its position might do the trick.
In some cases, mineral buildup or sediment can cause a continuous flow of water into the bowl. Cleaning out these components could help resolve the issue without needing to call a plumber right away. Remember, addressing a running toilet promptly will not only save you from headaches but also conserve water and reduce your monthly expenses.
A. Reasons for a running toilet
Have you ever experienced the annoyance of a running toilet? It’s not just irritating; it can also lead to wasted water and higher utility bills. One common reason for a running toilet is a faulty flapper that doesn’t seal properly after flushing. This can allow water to continuously leak into the bowl, causing the tank to refill constantly.
Another possible culprit could be an issue with the fill valve or float mechanism in the tank. If these components are not functioning correctly, they may cause water to enter the overflow tube, leading to a never-ending cycle of refilling.
Additionally, sediment buildup in the tank or on various parts inside could also be contributing factors. Over time, minerals and debris can accumulate in your toilet’s mechanisms, affecting their ability to operate efficiently.
Understanding these reasons for a running toilet is crucial for effectively diagnosing and resolving this common plumbing issue.
B. Simple
Dealing with a running toilet might seem like a complex issue, but in reality, it can often be resolved with simple fixes that anyone can do. One common reason for a toilet to run continuously is a faulty flapper valve that doesn’t seal properly after flushing. This causes water to leak into the bowl and triggers the tank to refill unnecessarily.
To tackle this problem, start by turning off the toilet’s water supply and removing the tank lid. Check if the flapper is worn out or misaligned; if so, adjust or replace it accordingly. Another potential culprit could be an imbalanced float arm, which controls the tank’s water level. Adjusting its position can help stop constant refilling.
If none of these solutions work, consider checking for mineral buildup around your fill valve or consulting a professional plumber for further assistance. Remember, even seemingly complicated plumbing issues often have straightforward remedies when approached with patience and care.
Conclusion
In our fast-paced lives, having a basic understanding of DIY plumbing fixes can be genuinely beneficial. From unclogging drains to fixing leaky faucets and running toilets, tackling these common issues on your own not only saves you time and money but also gives you a sense of accomplishment.
By following the step-by-step guides provided in this article, you can confidently address these plumbing problems without having to wait for professional help. Remember, with the right tools and knowledge at hand, you can handle most minor plumbing issues efficiently.
So roll up your sleeves, equip yourself with the necessary tools, and take charge of your home’s plumbing maintenance. Master these essential DIY plumbing fixes—your wallet will thank you!