Colored wood dye is an invaluable tool for enhancing the beauty and longevity of wooden furniture or flooring. It allows you to customize the appearance of wood, adding vibrant hues or subtle tones that highlight the natural grain.
This comprehensive guide will explore everything you need to know about coloured wood dye, from its types and applications to tips on achieving the best results.
Contents
- 1 Introduction to Coloured Wood Dye
- 2 History of Wood Dyeing
- 3 Why Use Coloured Wood Dye?
- 4 Types of Wood Dye
- 5 Choosing the Right Wood Dye
- 6 Preparation Before Dyeing
- 7 Application Techniques
- 8 Drying and Curing Process
- 9 Finishing Touches
- 10 Common Mistakes to Avoid
- 11 Maintenance of Dyed Wood
- 12 Colored Wood Dye in Interior Design
- 13 Environmental Impact of Wood Dye
- 14 DIY vs. Professional Dyeing
- 15 Popular Brands and Products
- 16 Conclusion
- 17 FAQs
Introduction to Coloured Wood Dye
Colored wood dye is a versatile product used to alter or enhance the color of wood surfaces. Unlike paint, which covers the surface, wood dye penetrates the wood fibers, allowing the natural grain to show through. This makes it ideal for anyone looking to maintain the natural beauty of wood while adding a splash of color.
History of Wood Dyeing
The art of dyeing wood dates back centuries, with early civilizations using natural extracts from plants, minerals, and insects to color wood. Over time, the process has evolved, and today, we have a variety of synthetic dyes that offer more vibrant and long-lasting colors.
Why Use Coloured Wood Dye?
Enhancing Aesthetics
One primary reason to use coloured wood dye is to enhance the visual appeal of wood. Whether you want a bold, dramatic effect or a subtle, natural look, wood dye can help you achieve the desired finish.
Protecting the Wood
In addition to aesthetic benefits, the the colored wood dye can protect the wood from damage. It penetrates deep into the wood, protecting against moisture, UV rays, and everyday wear and tear.
Types of Wood Dye
Water-Based Dyes
Water-based dyes are famous for their ease of use and clean-up. They are available in a wide range of colors and are known for highlighting the natural grain of the wood.
Alcohol-Based Dyes
Alcohol-based dyes dry quickly and offer intense colors. They are ideal for projects where a fast drying time is crucial, but due to their rapid evaporation rate, they can be more challenging to work with.
Oil-Based Dyes
Oil-based dyes penetrate deeply into the wood, providing rich, long-lasting colors. They are perfect for hardwoods and projects that require a durable finish.
Gel Dyes
Gel dyes are thicker and more easily controlled, making them suitable for vertical surfaces or intricate designs. They provide even coverage and are less likely to run or drip during application.
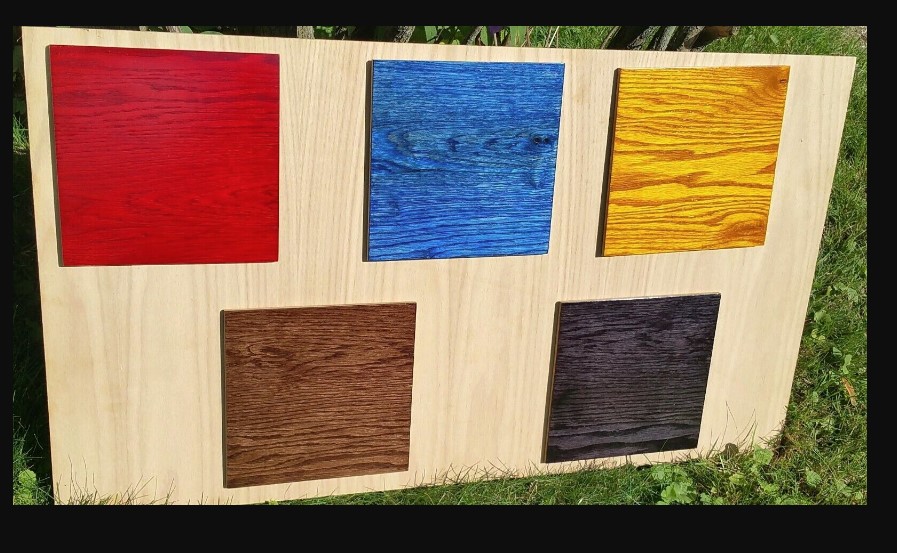
Choosing the Right Wood Dye
Considering the Wood Type
Different types of wood absorb dye differently. Hardwoods like oak and mahogany may require a different dye than softer woods like pine. Choosing a dye compatible with the wood you’re working with is essential.
Desired Finish and Color
The desired finish and color also play a role in selecting the suitable dye. Test different dyes on scrap pieces of wood to see how they look once applied and dried. This will help you choose the best color for your project.
Preparation Before Dyeing
Cleaning the Wood
Before applying any dye, ensure the wood is clean and free from dust, dirt, and grease. This will help the dye penetrate evenly and prevent blotching.
Sanding Techniques
Sanding the wood is crucial for a smooth finish. Start with a coarse grit sandpaper and gradually move to finer grits. This will open up the wood pores, allowing the dye to penetrate more deeply.
Testing the Dye
Always test the dye on a small, inconspicuous area or a scrap piece of the same wood. This will give you an idea of how the color will look and allow you to make any necessary adjustments before applying it to the entire surface.
Application Techniques
Brushing
Brushing is a standard method for applying wood dye. Use a high-quality brush to apply an even coat of dye, following the direction of the grain.
Spraying
Spraying provides a smooth, even finish and is ideal for larger surfaces. When using a spray gun, ensure you have proper ventilation and wear protective gear.
Wiping
Wiping the dye with a cloth can give a more subtle, controlled application. This technique is excellent for achieving a lighter, more transparent look.
Drying and Curing Process
Allow the dye to dry completely according to the manufacturer’s instructions. This typically takes several hours to a day, depending on the type of dye and environmental conditions. Proper drying is essential for achieving a durable, long-lasting finish.
Finishing Touches
Sealing the Dye
Once the dye is dry, apply a sealer to lock in the color and protect the wood. Sealers come in various finishes, from matte to high gloss, allowing you to customize the look further.
Adding a Top Coat
A top coat, such as polyurethane or varnish, adds an extra layer of protection and enhances the wood’s appearance. Apply it carefully to avoid bubbles and streaks.
Common Mistakes to Avoid
Avoid common mistakes such as not testing the dye, applying too much at once, or not allowing enough drying time between coats. These can result in uneven color, blotching, and a less durable finish.
Maintenance of Dyed Wood
Maintaining dyed wood involves regular dusting and cleaning with a damp cloth. Avoid harsh chemicals that can damage the finish. Periodically reapply a top coat to keep the wood looking fresh and vibrant.
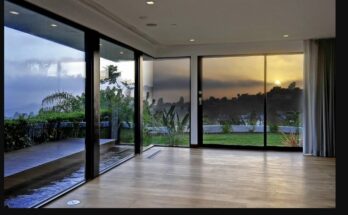
Colored Wood Dye in Interior Design
Colored wood dye can be used creatively in interior design to match the the furniture with existing decor, create accent pieces, or give old furniture a new lease on life. Its versatility makes it a favorite among designers and DIY enthusiasts alike.
Environmental Impact of Wood Dye
Consider using eco-friendly wood dyes low in volatile organic compounds (VOCs) and made from sustainable materials. This helps reduce your environmental footprint while still achieving beautiful results.
DIY vs. Professional Dyeing
While DIY dyeing can be rewarding, it requires time, patience, and attention to detail. Consider hiring a professional for large or intricate projects to ensure the best results.
Popular Brands and Products
Some popular brands offering high-quality wood dyes include Minwax, General Finishes, and TransTint. Each brand offers a range of products for different types of wood and finishes.
Conclusion
Colored wood dye is an excellent way to enhance the beauty and durability of wooden surfaces. By understanding the different types of dyes, proper application techniques, and maintenance tips, you can achieve stunning results lasting for years. Whether you’re a seasoned DIYer or new to wood finishing, colored wood dye opens up a world of possibilities for your projects.
FAQs
1. Can I mix wood dye colors to create a custom shade?
Yes, mixing different
colors of wood dye can create custom shades. Before applying it to your project, experiment with small amounts to achieve the desired color.
2. How many coats of wood dye should I apply?
The number of coats depends on the desired intensity of color. Generally, 1-3 coats are sufficient. Always allow each coat to dry completely before applying the next.
3. Can I use wood dye on outdoor furniture?
Yes, but it’s essential to use a dye suitable for outdoor use and apply a protective top coat to shield the wood from weather elements.
4. How do I remove wood dye if I’m unsatisfied with the color?
Removing wood dye can be challenging. Sanding the surface thoroughly or using wood bleach can help lighten the color, but it may not completely remove it.
5. Is wood dye safe to use around pets and children?
Water-based and eco-friendly wood dyes are generally safer options. Always check the manufacturer’s safety guidelines and ensure proper ventilation during application.
If you gained new insights from this article, explore our blog, Gimkit, for more enlightening content.